Pages

Showing posts with label Grilled. Show all posts

October 1, 2011

Meatball Challenge #1: Grilled Italian Meatball Skewers

I'm doing my first personal cooking challenge. It started when my mom gave me a big bag of frozen meatballs that she didn't want. I was determined to make things other than spaghetti and meatballs or meatball subs (though I'll probably end up making these both). I wanted something new and different and I found my answer while looking through my pantry. Here it is, a simple meal that has tons of flavor and great textures - all on a handy stick.


What You'll Need:
18 meatballs (frozen or fresh)
1/2 jar/can of tomato sauce
2 zucchini 
cherry tomatoes
skewers

Start by preheating your oven to 350 degrees. Place around 18 meatballs on a foiled cookie sheet. I guessed I would probably put around three meatballs on a skewer and we would each have three skewers so I only cooked 18. Cook them for 15 minutes so they heat all the way through. I had no idea how these would taste but I went for it anyway.

Next you can get your zucchini ready. You're going to want the pieces around the same size as the meatballs so they cook evenly. I decided to make the pieces square so they would keep the skewers from rolling around with the round tomatoes and meatballs (I thought about this from past experience). This actually really helped.
 

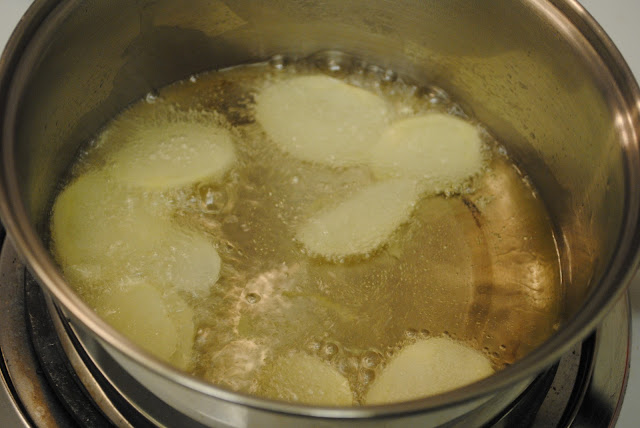
Now I don't know about you, but I need more to my meal than three skewers of mostly veggies - especially when I had no way of knowing how they would turn out. I figured since we were having a relatively "healthy" meal I could add a little more fat. I decided to make potato chips too. Cut around 6 potatoes into thin slices and fry in two inches of oil. Place them on a plate with a paper towel on it and sprinkle some salt when they come out.

Lately I've been using the big cans of tomato sauce, but I usually only need about half a can when making food so I store the other half in an empty spaghetti sauce jar. I usually have sauce at hand all the time and I had half a jar in my fridge so I decided to use some to heat the meatballs in. This was a fabulous idea. Put the sauce in a sauce pan and keep on low heat to keep the splattering to a minimum. The sauce is already delicious on it's own but I added some black pepper, basil and oregano for some extra oomph. I think if I made this again I would add chili flakes for some extra spice.

When the meatballs are done, and while they're still hot, place them in your heated sauce. I left mine in for about 8 minutes so they could soak up some sauce (according to Mike and Alton Brown, this works. Good enough for me). At this point the meatballs have all sorts of potential for other dishes.
Mmmmm
When the meatballs were basically done, I left them in the sauce and got my veggies and skewers ready to start assembling. All kinds of veggies would be good with these too. Mushroom and onions would probably be amazing but this is what I had on hand.

I ended up only putting two meatballs on a skewer then I made an all veggie skewer (which was also delicious). Tell me these don't look good already...

I placed the skewers aside and heated up my grill. Confession: I'm slowly starting to fall in love with this grill... in a totally normal way though. It heats in a couple of minutes, DRAINS FAT, and makes food taste better. Yes my friends that is all love.

When my grill was heated I was able to fit most of my skewers on the first round. I cooked mine for 6 minutes with the top closed down, turned them, then cooked them for another 4-5 with the grill open. Since the meatballs are already cooked you just have to cook the zucchini to the texture that you want.

When they're done, plate them and pour more of your tomato sauce over them. Serve them with your potato chips, a cold glass of lemonade, and enjoy.

Overall, I don't think I did too bad for my first "challenge." The flavors were great and the meatballs had a great flavor. This was the perfect amount of food for us too. This makes me very excited about the food that's to come. Stay tuned my fellow foodies.

September 7, 2011

Labor Day Dinner

When you're a college student it's nice when a break from school comes so early in the semester. Both Mike and I had the whole day off from school and work for Labor Day so we decided to make something special - and to have one last hoorah before the end of summer. Our menu included grilled steak (the college students' apartment version of BBQ), macaroni salad, and sweet corn on the cob. Neither of us have ever cooked a whole steak before, let alone one on an electric grill, so we were excited to see what would happen. Start with the thing that takes the longest, the macaroni salad.

Macaroni Salad

What You'll Need:
 1 pound of Macaroni salad noodles
6 Boiled eggs
1 bunch of Green onion
Mayonnaise
1 sm can Chopped olives
3-4 Pickles
Salt
Pepper
Mustard

Start by boiling your water for the eggs and noodles. Boil your eggs for about 15 minutes and your noodles for about 10. Drain and rinse both to let them cool.

Meanwhile while both are cooling chop up your onions and pickles. I like these chopped extremely small. 

Use a cheese grater to shred your eggs. Don't shred the yolks because you'll end up with a mess. You can just use a fork to mash them up, it's a lot easier. Put the noodles, onion, pickles, and eggs in a big serving bowl. 

Now add a couple heaping spoonfuls of mayo. I LOVE mayo!! I can never have enough on my food, however it's not Mike's favorite thing but he likes it enough to add the amount that we're both happy with. Then when the consistency is the way you want it pour a little of the pickle juice from the pickle jar in the bowl. This gives the salad the perfect tang! 

We usually do a little pickle juice and a little mustard. Together they make the salad really zingy, you can add one or the other, but together = mmmmmm. Then we add half a can of the olives. Mix everything together and taste it.

After tasting add salt and pepper. You're probably going to need a lot because this makes a lot of salad. Add more of other things at this point too if you feel it needs it. When this is done put it in the fridge immediately.

The Steak

What You'll Need:
2 Steaks of you choice
Salt
Pepper
Season All
Garlic powder

We used our electric grill because we can't afford a gas BBQ grill. I know Mike would have loved to use one but I'm not down for using the ones the park provides. We did what we had to do and our steak was still awesome, I'm here to tell you it can be done my foodie friends. 

You all know me and my fear of raw meat and bacteria, trust me I was SUPER careful so I turned on my grill to heat up before I even touched the meat. Take your steak and sprinkle your seasonings on both sides. I didn't buy any special steak seasoning even though I looked, because it's expensive!! I mean three bucks for the seasoning, seriously? I could make-do with what was in my cabinet.

When your grill (of any sort) is heated put the steaks on. Since our was electric we sprayed it with Pam before hand because we had no idea if it would stick or not.

Cook the steaks for about 4 minutes on each side. We didn't close the grill down, we just flipped them after a few minutes so we could control the cooking process a little more. We cooked the meat until it was 160 degrees then took it off. 

 The Corn

What You'll Need:
2 cobs of Corn
2 Tbl of Sugar

The corn is the quickest thing to make. Snap your cobs in half. I did this so they fit on the plates better. Put enough water in a pot to let the corn float without touching the bottom. Let the water reach a light boil and add the sugar. Carefully put in the corn and wait about 8 minutes. You can get this done while you're doing another part of your meal. I just love when eating healthy is super easy. When the corn is done, carefully take it out and put butter on them (not as healthy, I know).

So I know this wasn't the BBQ that most people have on Labor Day weekend. I know that nothing can compare with that BBQ taste you get from an actual BBQ pit but we didn't do half bad with our little electric grill. The steak was juicy (and gave me an excuse to by A1 sauce), the salad was cold and the perfect contrast to everything else that was warm. And to add a little sweetness to all of the different flavors was the corn. It was juicy and sweet. Overall it was the kind of meal where you start eating a part of it and forget that there are other parts and when you start eating those you get hooked on that. It was a really great meal to bring our summer to a close.

August 23, 2011

Classic Avocado Cheeseburgers and Fries

It's not a secret that we eat organic as much as we possibly can. The only problem with eating meat that's not mass-produced and mostly meat-filler is that it's expensive. Being college students, we can't exactly spend a lot of money on meat, especially when I can make a lot of tasty dishes that don't need it.

However, I was relieved when my mom sent a care package of grocery essentials that included hamburger meat. Right away I started thinking of all the recipes I could make - anything but meatloaf or Hamburger Helper. We also don't get the chance to eat out often (even though we think of every reason why we should) so what better thing to make than cheeseburgers? My mom gave us a pound of meat, but since there's only two of us I only used half. The problem was that I didn't think just the burger would be enough after a long day at work, so I decided to make fries too.

Beware, this is not a healthy meal. The thing is, well, I didn't try to make it one - if you can believe that. I think some meals should just be what they are. This is one of them.

French Fries

What You'll Need:
 4 Potatoes 
Vegetable Oil
salt

Start the fries first. Peel about 4 potatoes and cut them into your favorite fry shape. I chose to go with long fries that would get crispy.

Heat about 2 1/2 inches of oil in a large pot. After a few minutes on medium heat, the oil should be hot enough. Put a small fry in and see if it sizzles. If it just sits there and no bubbles are coming out, it's not hot enough. So when it is put just a few fries in. Make sure they're all submerged in oil so that they all cook evenly. Use tongs to flip them after 4 minutes.

When they are golden brown take them out and put them on a plate with two layers of paper towels to absorb the oil. Sprinkle salt on them right away. Remember to cook these in small batches, it may take a little longer but they will cook evenly. You can also put any other kinds of seasonings on your fries at this point. This is just my basic recipe but lot's of stuff would be awesome - but all that's for another post...


Classic Avocado Cheeseburgers

What You'll Need:
1/2 - 1 pound Hamburger Meat
 Pepper
Garlic Powder
Season All
1 Avocado
 American cheese
Tomato
Lettuce
Mustard
Mayonnaise
2 Hamburger buns

Before you get your hands germy and dirty get out your grill and preheat it. We don't have a BBQ (yet) but we do have a grill/griddle thing that's a lot like a George Foreman. Get your 1/2 pound of meat and separate that into two pieces. I'm super phobic about raw meat!! I probably washed my hands five times just caring the meat from place to place. I hate the amount of mess raw meat leaves behind and I hate knowing how sick it can make people so please be careful!
 

You can use your own seasonings for burgers but I didn't have the opportunity to go out and by special stuff so I made my own "grill mix." Season All is my favorite seasoning to put on chicken or beef. Add the amounts of stuff you like onto each soon-to-be-patty. 

Roll each half into a ball making sure to mix the seasonings in well. Pat those down into patties. Wash your hands. Done.

By now your grill should be hot. Throw those babies on. While they're cooking cut your avocados, mayo-up your buns, and wash the lettuce. After about 8 minutes the patties should be done. I actually lowered the heat because I was afraid I would burn them or something. So just cook them until they're not pink in the middle anymore. Mine are a little dark from some of the extra seasoning I put while they were on the grill but they were totally juicy and delish!

 Assemble your burgers and serve the fries. And don't worry about the fact that you're eating a burger - enjoy it... it's awesome and you know it!

January 26, 2011

Portobello Mushroom Pitas and Cheesy Garlic Potatoes

In order to eat healthier this new year I've changed a lot of eating habits. I now eat a lot less red meat, and if I do eat it, it's organic so I actually know what I'm eating. This is actually a little more expensive which is another way I can monitor how much I eat. I also eat way more organic foods and way less processed foods in general and I actually can't remember the last time I had fast food. When I go out to eat I no longer indulge and only get what I know I'll eat- which leaves me with a lot less leftovers. For Christmas I got Michael a new grill (among other things) so we could both eat healthier. The cool thing about the grill is the grill plates come out and you can put griddle plates in instead... I fell in love as soon as I saw the thing. These Portobello Mushroom Pitas were the first meal I made with the grill. I'm a sucker for mushrooms and I'll eat them any way you give them to me (probably) so this was a definite yes. I found the prettiest ones at Trader Joe's and got my favorite pita bread from them too. I didn't think one pita per person would be enough so I decided to make some potatoes on the side. 
I had made a version of these potatoes for the blog before, and many times after, but since I didn't have red potatoes I improvised. Here's the link to that Baked Potato Chips I made before.

While I was preheating my oven and grill, I sliced 6 Yukon Gold potatoes and layered them with butter, salt, garlic powder, chopped garlic (the kind that comes in the jar), black pepper, and parsley. When my oven was preheated to 350 degrees I covered my 8x8 pan with foil and put them in for 25 min.
What I got when I pulled them out.
While the potatoes were cooking I wiped the curved part of the mushrooms with a damp paper towel and got a little bowl and poured some olive oil into it. To the oil I added garlic powder, salt, chopped garlic, and pepper (see a trend with my ingredients?) and brushed this on the outer part of the mushrooms. No I didn't measure anything, I just poured enough oil to LIGHTLY coat the tops of both mushroom. By this time my grill was hot. I set my temp for this at 300 because I figured it shouldn't be too hot. I put the oil-coated side down and put the top down.
I only pressed it like this for about 4 minutes. I didn't brushed the other side with oil because I figured I didn't need the extra. This is what I got :)
I washed some lettuce and cut some tomato to put in my pita. 
I didn't put any mayo in my pita like I usually do but I did put a little ranch just because it sounded good. And guess what- it was!
By the time I was done with making my pitas my potatoes were nice and soft. I had some Cheddar/Monterey Jack cheese mix leftover from taco night so I put a healthy amount on my potatoes when they came out. 
Once the cheese melts this was a good amount of food for two people without leaving you feeling gross and overly full. I really hope you enjoy it too.

June 8, 2010

Camping!

We decided to take our first camping trip of the year last week. We had a great time and the weather was perfect. We love hiking, fishing, and the whole not showering thing... Something that we also get excited for is the food,though. We go beyond just roasting hot dogs and boiling water. Mikey usually handles the dinner portion (because it means he can play with the fire) while Mo handles breakfast. Our overall menu included eggs, potatoes, bacon, baked potatoes, roasted corn on the cob, clam chowder, chicken sandwiches with tomato, hot dogs, and S'mores. Oh yeah- we know...


Let's talk about the propane stove we had. It was small and only held one pan (or pot) at a time but it was so easy. It held the pot for the chowder, the pan for the bacon, the eggs, and the potatoes, and even was easy enough to use for a just a tea kettle for a quick cup of hot chocolate. The best part is that we could keep the stove by the campfire in case we absolutely needed hot chocolate but didn't feel like getting up :)

Breakfast was another thing that we had a good system for thanks to our wonder stove. Since we were only feeding the two of us we could use one pan to make everything for breakfast. One day breakfast came out particularly well; Bacon-Scrambled Eggs and Breakfast Potatoes. First cut the bacon into small pieces then cook it so there's enough fat in the pan to cook the potatoes. When the bacon's done but it on a plate with a paper towel and cover with foil. Next you have to dice the potatoes up then put them in the pan as soon as the bacon is done. Mo hates to cover things because it keeps her from being able to see what's happening but we did it anyway and they cooked faster. When the potatoes get soft and you've put enough garlic powder, salt and pepper on them then put them onto a plate and cover with foil too. Leave whatever oil is left in the pan and turn you pan to low heat. Now add beaten eggs. They should start cooking right away. You need really low heat. Mo is sort of awesome at eggs and knows you can't rush the process. When the eggs start to cook together and have lost most of their liquid consistency add the chopped bacon to the eggs. Fold, mix, stir, you know.
*Quick tip* We don't bring milk when we camp but if you're like Mo and won't cook without something in your eggs then used evaporated milk. It does the same thing, just as well.

You can't tell us that's not a pretty good meal for one pan, cooked in the outdoors! It was really filling and cleanup was minimal.