Pages

Showing posts with label Holiday. Show all posts

December 13, 2011

Thanksgiving Catch-Up: Blogging Through the Holidays!

I literally have one more final left then I'm on vacation. I've taken a hiatus from blogging so I could focus on pre-final tests and papers, then finals themselves. As always I have soo much to blog but I wanted to let you know how my holidays have been. We're currently getting ready for Christmas (I'll be in full-swing Christmas mode when finals are done) but we've already had some of our traditions here: Thanksgiving being the first one. Mike and I both attended our families Thanksgiving dinners, then I attended my parents' dinner, then our personal one here at home. Three Thanksgivings. Yeah, I'm still full. I won't get into my recipes (except for one that I'll post later) so I'll just let you know what I was up to for my weekend-long feast.

On Thanksgiving day I woke up, watched the parade, then headed off to San Jose to see my family. We usually have that dinner pretty early because my aunts and uncles have dinner with their in-laws too and so on. There was no shortage of food there either.
My uncle and the newest member of our family - his grandson!

I had a great time with my family and enjoyed seeing everyone since it had been so long and I've moved pretty far.

On Friday it was also Mike's birthday (he's a Thanksgiving baby) so we had plans that night but my parents always have their own Thanksgiving for us the next day so I attended that too. This is the spread my mom had for us. It consisted of turkey, homemade stuffing, yams, homemade mashed potatoes, rice (because we're Mexican and we eat it with almost every meal), and cranberry sauce.
Yeah, I rocked this...

Our last Thanksgiving was on that Saturday. I started this tradition when Mike and I moved out last year so we could have our own leftovers. It's really what got me started in blogging again. I had forgotten how fun it could be to cook multiple items at once, and the pressure and satisfaction that comes with pulling it off. Folks, this is for you, I owe you one.This year I found out something about myself. I don't like turkey. I mean I'll eat it, but I usually go after all of the side dishes. And I realized the older I get, the lazier turkey makes me. It's just not my favorite thing, but I made one anyway. Along with my turkey I had stuffin' muffins, mashed potatoes, yams, rice, and a potato salad.

*Confession* I don't know the difference between sweet potatoes and yams and I honestly don't know which ones I made but they were good. Also, I'm sorry if my version differs from the traditional way, I don't know what that is either but feel free to let me know.

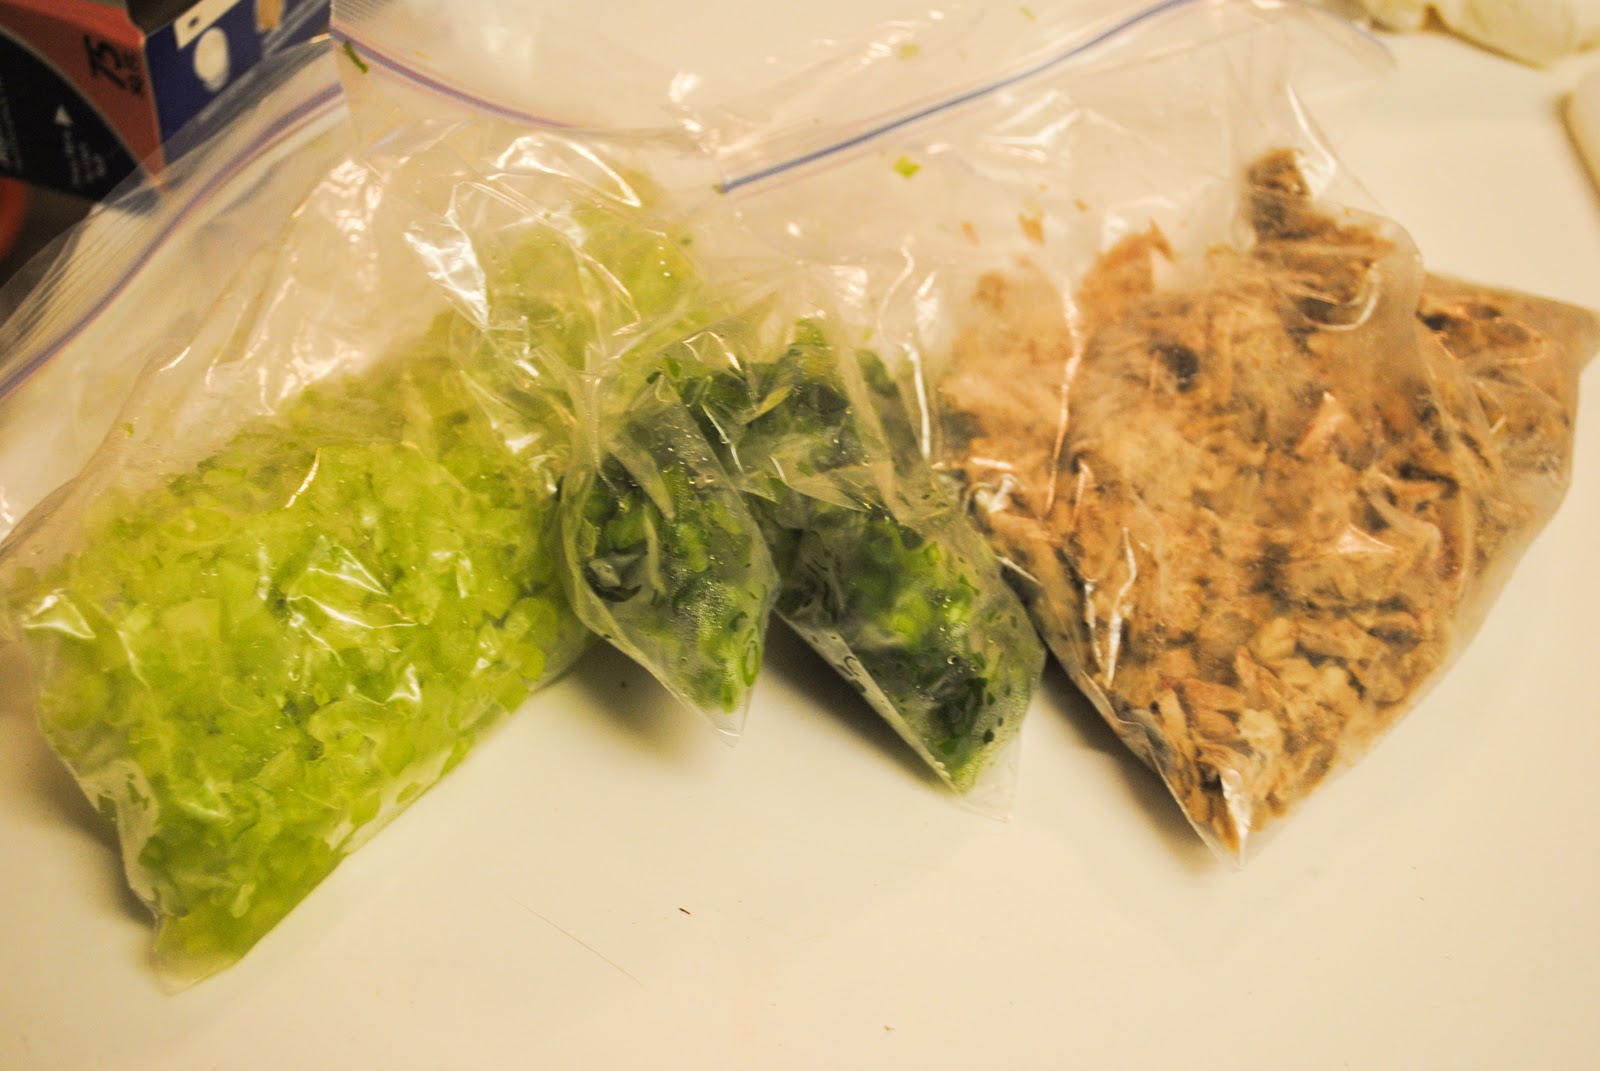
These are the ingredients that my lovely father chopped really really tiny for me. He's the best at it. These are bags of celery, green onion, and the turkey neck (let's all ignore the third thing together). I sauteed them in a bunch of butter then added a box of Stovetop stuffing and half a bag of plain stuffing. This is my secret. You're welcome :) unless you do it too.
For my potatoes I did the usual boiling of potatoes and whipped them with cream and butter (calories and I are good friends over the holidays).

My stuffin muffins ready to go....

My yams crushed up with crushed pineapple, walnuts, brown sugar and topped with mini marshmallows.

This is the first time we had this but we got them from Mike's dad. This is the exact recipe we used. Please try them - they're delicious and very unhealthy!!

This is the guest of honor. Not too bad huh? 

Not a bad feast for college students on a budget. We both really enjoyed it too. Don't worry I didn't forget about dessert! I'll be posting my Pumpkin Cheesecake recipe soon. See you all then. Cheers!

November 1, 2011

Halloween Treats - Pinwheels and Pizza

One of my favorite holidays is officially over. It makes me sad because I absolutely love Halloween, but I'm also excited because it means the holiday season has officially started. When I was little my parents would let me go all out for Halloween, sometimes having multiple costumes for school and trick or treating. As I got older I looked forward to the month long airing of scary movies. Now I would never say that I'm too old for trick or treating because you can never be too old for a costume and candy, but since my life has been getting increasingly more hectic, the thought of walking in the cold, dressed as a sailor, knocking on strangers doors in an area I'm still new to didn't sound like my kind of thing, besides I had already gone out on Saturday night and had a fabulous time.

 
It didn't help that Halloween was on a Monday this year either, so I was ready to kick back and veg out. I did buy two bags of candy for any trick or treaters that might stop by (but what kid wants to climb stairs just to get candy... ok probably a lot) but our plans consisted of a scary movie marathon, margarita style pizza, and spinach and tomato pinwheels. I don't know if the whole bowl of candy was intended to be on the menu, but Mike and I ate it as an appetizer, main course, and dessert. Ooops...

Right before the good parts of Signs started we made our pizza. In 20 minutes dinner was done. As most of my go-to meals, these are semi-homemade to - you know how I roll.

Pinwheels
I'm not sure what these are really called but this name works for me. I got this idea from a Pillsbury commercial shown during the holidays last year, but I added a little extra oomph - tomatoes!! This is the perfect appetizer. I'm thinking about making these for Christmas Eve when I visit my family because they're so easy.
What You'll Need:
1 can (roll?) of refrigerated biscuits
chopped frozen spinach
1/2 a tomato
1/2 C of mozzarella cheese

Start by taking out all of the biscuits and rolling them into one piece of dough. Make sure the dough is rolled about 1/2 an inch thick. Sprinkle the cheese, spinach and tomatoes and lightly press down into the dough. Then roll the dough as tightly as possible and cut the roll about a 1/4-1/2 inch thick and place them on a greased cookie sheet. Bake them for as long as the container says to - about 10 minutes.

Eat them while they're hot. We ate ours with the pizza and it was the perfect meat-free (guilt-free) meal for a night in. 

Margarita Style Pizza

Once again this is an ode to a semi-homemade meals. I didn't feel like making a homemade crust so I bough one from the store. The crust was a little more spongy than I'm use to but the taste worked because of all the flavors on top. I made my own pizza sauce too.

What You'll Need:
Pizza Sauce
Pizza Crust
Mozzarella cheese slices
Basil
Tomato slices 

How could a pizza this simple be bad? For my sauce I just used one small can of tomato sauce and added some salt, garlic powder, Parmesan cheese, pepper, and oregano. I spread the sauce over my store bought crust, then put a layer of basil, cheese and then tomato.

Bake the pizza for 14 minutes at 450 degrees. This is just long enough to put the dishes in the sink (to wash later) and perhaps make a drink...hmmm...

This pizza is the perfect light pizza to eat while your sitting in sweats watching scary movies on the couch. I put a little fresh basil (which is currently my new obsession) on top and curled up - mainly because I was too scared to keep my feet on the floor... The tomatoes are so juicy and the cheese is so creamy that you should probably make two pizzas because they're so good.

We ended up having the best Halloween. It was perfectly relaxing and I couldn't have asked for anything better. I hope you all had a good Halloween too. I look forward to starting the fall off with you guys. Cheers!

September 7, 2011

Labor Day Dinner

When you're a college student it's nice when a break from school comes so early in the semester. Both Mike and I had the whole day off from school and work for Labor Day so we decided to make something special - and to have one last hoorah before the end of summer. Our menu included grilled steak (the college students' apartment version of BBQ), macaroni salad, and sweet corn on the cob. Neither of us have ever cooked a whole steak before, let alone one on an electric grill, so we were excited to see what would happen. Start with the thing that takes the longest, the macaroni salad.

Macaroni Salad

What You'll Need:
 1 pound of Macaroni salad noodles
6 Boiled eggs
1 bunch of Green onion
Mayonnaise
1 sm can Chopped olives
3-4 Pickles
Salt
Pepper
Mustard

Start by boiling your water for the eggs and noodles. Boil your eggs for about 15 minutes and your noodles for about 10. Drain and rinse both to let them cool.

Meanwhile while both are cooling chop up your onions and pickles. I like these chopped extremely small. 

Use a cheese grater to shred your eggs. Don't shred the yolks because you'll end up with a mess. You can just use a fork to mash them up, it's a lot easier. Put the noodles, onion, pickles, and eggs in a big serving bowl. 

Now add a couple heaping spoonfuls of mayo. I LOVE mayo!! I can never have enough on my food, however it's not Mike's favorite thing but he likes it enough to add the amount that we're both happy with. Then when the consistency is the way you want it pour a little of the pickle juice from the pickle jar in the bowl. This gives the salad the perfect tang! 

We usually do a little pickle juice and a little mustard. Together they make the salad really zingy, you can add one or the other, but together = mmmmmm. Then we add half a can of the olives. Mix everything together and taste it.

After tasting add salt and pepper. You're probably going to need a lot because this makes a lot of salad. Add more of other things at this point too if you feel it needs it. When this is done put it in the fridge immediately.

The Steak

What You'll Need:
2 Steaks of you choice
Salt
Pepper
Season All
Garlic powder

We used our electric grill because we can't afford a gas BBQ grill. I know Mike would have loved to use one but I'm not down for using the ones the park provides. We did what we had to do and our steak was still awesome, I'm here to tell you it can be done my foodie friends. 

You all know me and my fear of raw meat and bacteria, trust me I was SUPER careful so I turned on my grill to heat up before I even touched the meat. Take your steak and sprinkle your seasonings on both sides. I didn't buy any special steak seasoning even though I looked, because it's expensive!! I mean three bucks for the seasoning, seriously? I could make-do with what was in my cabinet.

When your grill (of any sort) is heated put the steaks on. Since our was electric we sprayed it with Pam before hand because we had no idea if it would stick or not.

Cook the steaks for about 4 minutes on each side. We didn't close the grill down, we just flipped them after a few minutes so we could control the cooking process a little more. We cooked the meat until it was 160 degrees then took it off. 

 The Corn

What You'll Need:
2 cobs of Corn
2 Tbl of Sugar

The corn is the quickest thing to make. Snap your cobs in half. I did this so they fit on the plates better. Put enough water in a pot to let the corn float without touching the bottom. Let the water reach a light boil and add the sugar. Carefully put in the corn and wait about 8 minutes. You can get this done while you're doing another part of your meal. I just love when eating healthy is super easy. When the corn is done, carefully take it out and put butter on them (not as healthy, I know).

So I know this wasn't the BBQ that most people have on Labor Day weekend. I know that nothing can compare with that BBQ taste you get from an actual BBQ pit but we didn't do half bad with our little electric grill. The steak was juicy (and gave me an excuse to by A1 sauce), the salad was cold and the perfect contrast to everything else that was warm. And to add a little sweetness to all of the different flavors was the corn. It was juicy and sweet. Overall it was the kind of meal where you start eating a part of it and forget that there are other parts and when you start eating those you get hooked on that. It was a really great meal to bring our summer to a close.

August 21, 2011

Chocolate Yogurt Dip

 Confession. I've been making this dip since I was a child. I found it in my first children's' cookbook when I was probably six. A few years ago I needed a fancy Valentine's Day dessert that could be done without taking too much time. Right away I thought back to this really easy dessert, and I've been making it ever since. All these years later, and having made it for Michael a few times now, he actually asks for it. Since my favorite dessert EVER is chocolate covered strawberries, and since recipe is just a variation of them, I enjoy making it.

The ingredients are really simple (you couldn't ask for an easier dessert)!
What You'll Need:
2 6 oz. containers of Strawberry yogurt
1 jar of Hot fudge topping
Strawberries (or your favorite fruit) for dipping

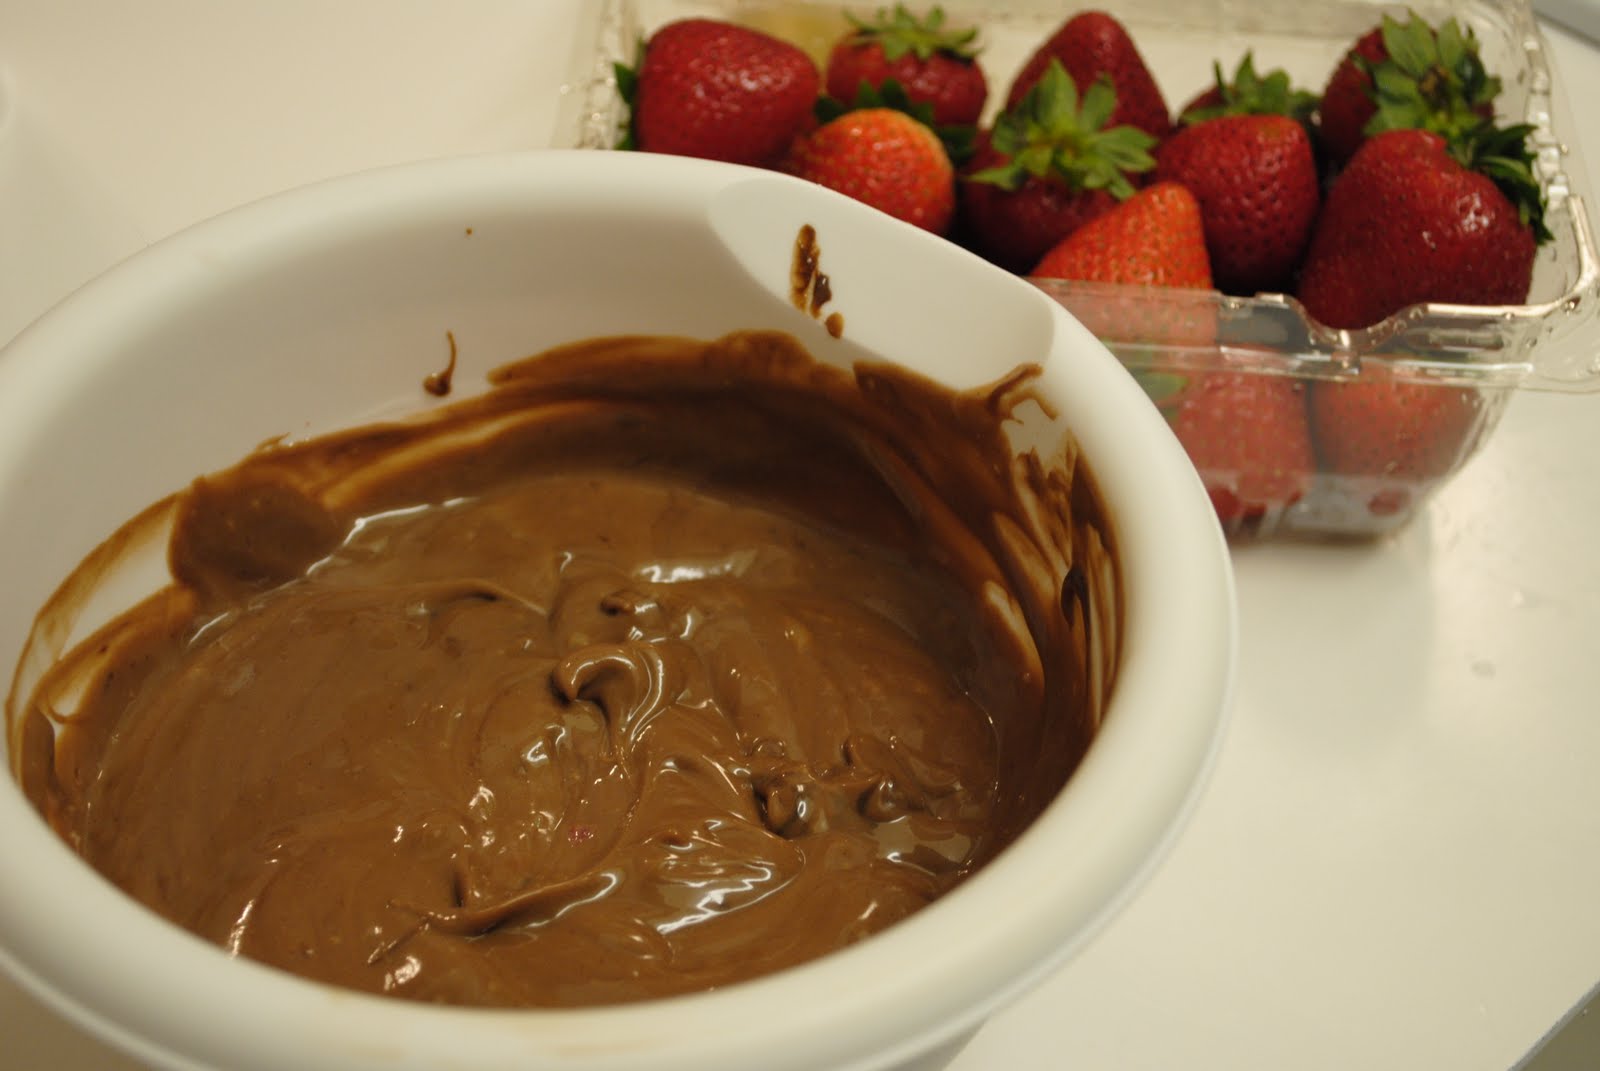
Mix both yogurt containers with 3/4 of the jar of fudge. Make sure the fudge is room temp so it mixes completely with the yogurt. I've never used any other kind of yogurt than strawberry but I absolutely love it. I imagine peach flavored yogurt would be pretty good too but I still like my strawberry.

I can pretty much eat this by the spoonful, and I'm not ashamed to admit it - it's delicious and look, it's done! You dip your strawberries right in the bowl or serve it up individually with a platter of fruit if you really want to get fancy about it. Either way it's all going to get eaten - trust me!

January 18, 2011

Holiday Cookies- It's Never Too Late

I won't lie it's been a while. Moving to a new city, being on my own, and starting at a new university. I've been meaning to blog- honest I have but it took a cold for me to actually sit down and find things to do. I got a Nikon D3000 for Christmas specifically to feed my love of photography (thank you Michael) :) so I really have been wanting to get back into this. One of the first things I was able to take pictures of was our holiday cookies. I got my camera before Christmas because he knew it would be helpful :) We made 3 different types of cookies- sugar cookies, chocolate crinkles, and classic chocolate chip. We made all 3 at the same time and rotated which ones we cooked (just to mix it up I guess).

Most of the the Ingredients


Classic Chocolate Chip Cookies
We got our recipe from Alton Brown's Chewy Chocolate Chip Cookie recipe. They are the perfect chocolate chip cookies and I don't know anyone that hasn't liked them.
Mike says the more brown sugar that goes into them, the chewier they'll be so I added about 2 T extra. We also doubled the batch so we yielded around 60 cookies from our batch.
Yes. This actually happened. :)


The Sugar Cookies
I got this recipe from my mom. We've been using the same recipe as long as I could remember. At first the dough seems crumbly but you really have to compress it down. After that, it should be the perfect sugar cookie dough.

I use powdered sugar instead of flour to keep the dough from sticking.


Chocolate Crinkles
These are another favorite of mine. They are a good mix between a cookie and a brownie. You should always let cookie dough chill in the fridge before you bake it but because the chocolate gets melted so the dough is pretty warm.

Push the cookies down a little because they don't flatten much in the oven. I dusted the flattened cookies with powdered sugar when they came out and they were insanely good.

I didn't post the recipes because I'm not sure if people want that info for 3 cookies but I do have them. I hope you like them :)