Pages

Showing posts with label Food Substitutes. Show all posts

January 31, 2014

Granola Clusters

Raise your hand if you're still keeping up with your New Year's resolution. Be honest, now. I have to admit that I got a slow start to mine but I'm still going. After all these years I've finally added the "eating healthy" resolution to my life. It's all part of making a better, happier me. I adapted this recipe from Cookies and Cups after needing more healthy snack and dessert options. Nothing is worse than working out or doing really good with your daily diet and feeling like you ruined everything with an unhealthy snack. Enter GRANOLA CLUSTERS! These little clusters are perfectly crunchy and just sweet enough and fill you up quicker than other junk food snacks! My favorite part was that even though there are quite a bit of ingredients, this recipe is so customizable that you could mix and match the ingredients with things that you have. Here's to us and our New Year's Resolutions!

What You'll Need:
2 1/2 cups oats (not instant)
1/4 cup melted butter
1/4 cup brown sugar (firmly packed)
1/4 cup honey
1/2 cup dried cherries
1 cup flaked coconut
2 cups corn flakes (lightly crushed)
1/2 tsp salt
1/2 chopped walnuts
1 beaten egg white

What To Do:

1. Preheat your oven to 300 degrees.

2. Line a large cookie sheet with non-stick foil or parchment paper and set aside.

3. In a large bowl mix all of your ingredients together. It's sort of a running joke between Mike and I that I never mix things in large enough bowls. So, my friends, use a LARGE bowl because there are a lot of ingredients.

*Spray your measuring cup with a little cooking spray in order to get all of the honey out of it.

4. Put the mixture on you cookie sheet and spread it around evenly.

5. Bake the granola for 25 minutes then turn off your oven but keep your granola in there until the oven cools. This was a great tip from Shelly (author of Cookies and Cups) that makes all the difference in how crunchy your granola gets.

**Her blog also has good tips on how to get less crunchy granola if that's not really your thing.

***As I mentioned, there are a lot of things that would go great in these. I happened to only have walnuts and dried cherries, because I love to snack on them, but cranberries, raisins, almonds, chocolate chips, or a mix of all of these would be a great addition. 

6. Once it's cooled start to break off pieces. The bottom will form a sort of crust that keeps everything together and is insanely delicious.

7. Save the mix in a air-tight container and enjoy throughout your day!


January 16, 2014

Cake Mix Biscotti

I feel like so many people have been trying to kick the processed foods out of their life. This makes me so happy! Being one of those people who actually can't stomach overly process foods the way I used to, I'm glad to come across more and more recipes that show ways to make this easy and be able to share recipes that can help others do the same. This recipe actually constitutes as semi-homemade rather than from scratch but there's a reason why. About 6 months ago I got pretty fed up with the "food" that was in my pantry. Boxed noodles, potatoes, brownies, cakes, rice, and so on - I had it all! I finally donated all that food because I wasn't eating it anymore and I had found really amazing substitutions that I actually preferred more. HOWEVER I kept a few things (like my boxed cake mix) to see if there was anything I could make with it, besides cake. I decided to make biscotti instead. That's how this cake mix substitution came to be. This is a fun way to clear your pantry of that processed powder you have in your pantry or cupboard and bring new life into foods that you're slowly trying to work your way out of.
What You'll Need:
1 box of chocolate cake mix
1 cup of AP flour
2 eggs
1 stick of butter (melted)
1/4 C of water
Chocolate for drizzling (optional)

1. Preheat your oven to 325 degrees.

2. Combine all the ingredients in a bowl and make a dough. I know it sounds like a lot of butter but it's totally worth it, I promise!

3. Divide dough into two pieces and place on a lightly floured work space.

4. Flatten each piece into a rectangle - 1" thick and 3" wide. You'll end up with two rectangle-shaped chocolate dough pieces. I know you can tell this is going to be good!

5. Bake each rectangle for 25 minutes on a foil lined baking sheet, until it firms up then let cool for a few minutes or until it's cool to the touch.

6. Slice each piece into 1.5" thick pieces and place back on a baking sheet. You'll end up with around 14 pieces. Bake for another 15 minutes to make them really crunchy.

7. Let them cool and drizzle with chocolate or a little powdered sugar. I chose to omit this process because I figured I had my calorie intake for the moment. Sure does sound good though!

8. Serve with coffee and ENJOY!

*Some delicious add-ins are walnuts, dried cherries, or chocolate chips!


August 28, 2011

Homemade Watermelon Jello

One of the best parts of every month is getting my new issue of Sunset Magazine. In my August issue, they talked about melons and how to pick and serve them. I never thought about all of the things you could do with ALL of the different types. One of the recipes they had was watermelon jello. I honestly never thought about making my own jello when I can just buy a box of it, but I had a watermelon in my fridge and I really wanted to be able to say "Yeah I made my own jello - no big deal." As it turns out, it's really easy to make. This is my version of it...


What You'll Need:
2 C of Watermelon juice
1/2 C of Sugar
2 1/2 packets of Gelatine
1 C Cold water
Cool-whip for garnish

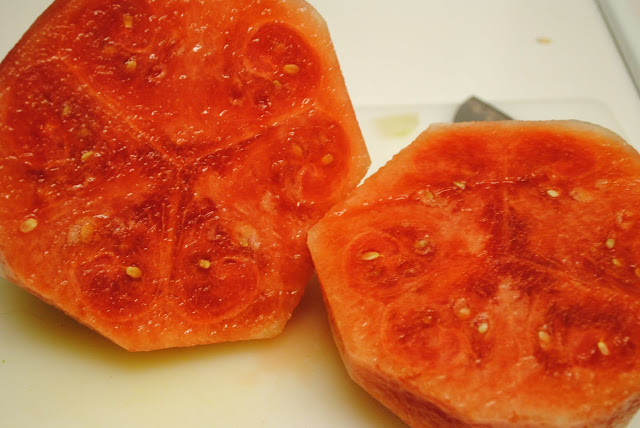
Sunset's recipe was for double this amount but it was only the two of us so I didn't need to make as much as their recipe called for. You can either use store bought watermelon juice or you can make your own - I made my own, it sounded like way more fun. I had a whole watermelon but if you're cutting the recipe in half, you only need half the watermelon. The first step is to start by cutting off both ends of the watermelon so you have two flat surfaces and no rolling watermelon. Carefully use a knife to to cut off the rind. Only take the rind off one half if you don't plan on using it right away. I was using the other half for another recipe so I peeled the whole watermelon at once.
My two halves, completely peeled.

Take one of your halves and cut that into pieces so you can puree it. The smaller you cut the pieces the easier it'll be to puree. Half way through pureeing it, use a spatula to push down the watermelon to help it along.

Once the watermelon is pureed strain it. You'll end up with a whole lot of watermelon mush and pure watermelon juice. You should have around two cups.
Pure watermelon juice...
A little helpful hint if you have more than 2 cups of watermelon juice is to pour them into ice trays and freeze the extra. You can use those to add to other juice or clear soda to make it sweeter and more flavorful and without watering down your drink the way ice will. If you don't have enough juice fill the rest up with store-bought watermelon juice or water. You won't taste the difference.

Not it's time to get the gelatine ready. Start by putting your 1 cup of cold water in a microwave safe bowl and adding your gelatine to that. Try your best to get as close to half a packet as possible. I found out a little more or less won't make a difference.
2 1/2 packets of gelatine in cold water

Let the gelatine stand for a couple of minutes. After a few it will have dissolved a little. Put the gelatine in the microwave for 1 minute. Then wisk your sugar into the gelatine. Pour your gelatine into your watermelon juice and wisk it. I mixed the gelatine-sugar mix and my watermelon juice in my big measuring cup so it would be easier to pour into my individual glasses.

Pour your jello into individual glasses to let set. I went super fancy with my serving dishes - mainly because I had nothing else cute to serve them in. It ended up working well with the over-sized wine glasses.

Let the jello sit in the fridge for about 2 hours. I made these in the afternoon so they were ready after dinner. When they are ready add as much cool-whip as you'd like and serve cold. We really liked how much they tasted like watermelon. I would say that because this dessert really brings out the natural sweetness of watermelon, you could cut these servings into quarters and actually serve 4 people. I think it would be the right amount per person. Sunset also says to serve with melon balls and mint which I think sounds delicious. I think it would help enhance the taste and texture of the jello. Overall, this is a really refreshing dessert and tastes exactly like watermelon!

August 25, 2011

Real Strawberry Lemonade

This is something I'm absolutely ecstatic about! This was completely conceptualized by me and the boyfriend. Here's how it started...

I have a subscription to Sunset Magazine (a magazine for living on the west coast) and my first issue was the August issue. They had a great spread about melons and different things to make with all of the different varieties (that's another post). There was a recipe for Summer Fizzies (yes I tried this too- recipe coming later) which are basically pureed melon, frozen into ice cubes and served with club soda. Even though these were super good and refreshing, they weren't sweet enough for me. I tried cantaloupe, watermelon and even mango. If you've ever tried it you know club soda doesn't have a lot of taste either, so we tried putting the ice in 7 Up soda. Mike and I were trying to think of other flavors and he suggested strawberry because they're sweet and have a recognizable taste. I happened to wonder out loud if instead of 7 Up, lemonade would be better? We were in total agreement that it would.

A couple days later I bought lemons and strawberries. Yes I bought lemons. You didn't really think I was going to use just-add-water lemonade did you? If I was going to do this, I was going to do it right - and Mike was in full support.

What You'll Need:
8 lemons
1 C Sugar
1 C Water
2 cartons of Strawberries
6 C Water

Start by getting your sous chef to juice all of the lemons. I don't know a whole lot about juicing because I never make fresh juice, but the manual juicer Mike's mom got us really helped. With all of the lemons, we got a little over a cup of juice.

While Mike was handling the manual labor, I made the simple syrup. I really recommend making a simple syrup for your lemonade instead of just adding sugar because it won't sink to the bottom the way granulated sugar will (I found this out when I was six), and you'll end up with a consistent sweetness. A simple syrup is really easy to make too, I promise. Over medium heat, add your one cup of water and your one cup of sugar. Stir frequently until the sugar dissolves.

When it's done take it off the heat and start your strawberries for the puree. Make sure they are washed. If you can, use a spray instead of the stream on your sink faucet. You don't want them sitting in any extra water. If not, no big deal.

Cut the tops of your strawberries off and any nasty parts. I know they're getting pureed but that's not good eats. You should also cut them into quarters, they puree quicker if the pieces are smaller. 

Add 2 tablespoons of sugar. This is optional though, there is already going to be a lot of sugar in this drink so you don't need to add more. Now, puree. Halfway through I always get a long spoon and stir what I'm pureeing to help it along. At this point add a 1/3 - 1/2 cup of water. Continue pureeing.

When it's done you'll have wonderfully pureed strawberries. With this the possibilities are endless! But for now, we put them in ice cube trays to freeze. Don't bother straining them. Mike had a problem with the seeds being there. I reminded him that he eats strawberries WITH the seeds all the time, and we moved on. Trust me, you won't even notice them. Mike agrees. 

You should have about two to three cups of puree, depending on your strawberries and the amount of water you added. So you'll need two ice trays. Fill them up like you would with water and put them in the freezer. We went out after we put ours in the freezer so they were able to freeze for a few hours.

Now it's time to show the lemonade some love. Pour your pure lemon juice into a 2 quart pitcher and all of your simple syrup. Like I said, if you feel like this is too much sugar only add some at first. You can add more after you add some water depending on how sweet you want it (you can always add, you can never subtract). We used half of the syrup at first.

Add a cup of water at a time and taste so you can monitor the lemon-sugar ratio to what you want. We ended up using 6 cups of water and all of the simple syrup. If you don't like pulp, use a little strainer to take it out, it floats to the top so it'll be easy. Cover and put in the fridge to get cold.
So worth the wait...
While we waited we found things to do then decided to go out and pass time...

A few hours later....

Get out a glass and and put several strawberry ice cubes in it. Fill the rest of the glass with lemonade.

After a little while of letting your cold drink sit the strawberry starts to dissolve into the lemonade. What you get is a magical mix of lemon and strawberry. The best part is that you get a whole pitcher and you know exactly what's in it. You can make as much of this as you want and it's a really refreshing way to spend your summer.

February 27, 2010

Baked Potato Chips

We are definitely not the kind of people who are against junk food. Everyone needs those days to eat way too much junk food, right? In an attempt to not be quite so glutenous we decided to make an adult version of potato chips by baking them and adding tons of herbs. Our only regret was that we didn't make a bigger batch. This was our first attempt and I don't think we would change anything if (...when) we make them again.

INGREDIENTS
(there's not very many)
3 Russet or red potatoes
garlic olive oil
thyme
oregano
parsley
garlic powder
salt

STEPS
Preheat oven to 450. Wash all the potatoes and cut into really thin circles.

Now place the rounds onto a big foil covered cookie sheet. We recommend you cover the tray in foil and spray it with non-stick cooking spray or use that non-stick foil to prevent the really thin slices from sticking. Brush the potatoes with a little garlic olive oil and lightly salt. Put the potatoes in oven for 10 minutes.

Mix the thyme, basil, oregano, and garlic powder together. Take the potatoes out and flip them over. Sprinkle a little of the herb mix on each potato and put back in the oven for 5 minutes.

Take them out and eat with some sour cream (or in Mikey's case, A LOT of sour cream).