Pages

Showing posts with label Vegetarian. Show all posts

July 21, 2014

Banana Oatmeal Pancakes

One of my favorite things about breakfast is that it's so versatile! Whether you're in the mood for something sweet, savory, healthy, indulgent, or a mix of everything you can get it for breakfast. Now, I love pancakes as much as the next person, but they're one of those foods that always leaves me feeling overly full. Who wants to start their day that way? (Probably the same people who would actually be willing to give up pancakes!). I decided to go for a healthier version of pancake that has no flour, no sugar, and no guilt. I got it off Pinterest a long time ago and was drawn to it again after going through some of my old pins - and having a craving for pancakes. These pancakes are a healthy alternative that don't actually taste like an alternative. These are the best option for those days that you feel like a big breakfast without wrecking the rest of your day!

What You'll Need:
2 eggs
1 banana (mashed up)
1/2 cup of oats
1/4 cup of applesauce
1 teaspoon of vanilla
1/2 teaspoon of cinnamon

What To Do:

1. In a food processor, grind up your oats until it turns into a fine powder. I used a Nutribullet because I have a special blade for this sort of thing but a magic bullet would work too.

2. Mix all of your ingredients in a bowl, being certain to fully incorporate the oat powder. 

3. Spray a skillet with non-stick cooking spray. Ladle about 1/3 of a cup of the batter into the pan. Once bubbles start to form on the non-cooked side it should be okay to flip.

*If you want to add things to the batter (i.e. fruit, nuts, chocolate chips, etc.) then you can add it to the raw side of the pancake before you flip it. 

4. Once the other side of the pancake is golden brown, serve immediately. 

5. You can use regular maple syrup (like I did) or you can garnish with fruit, walnuts, or whipped cream. Serve with some eggs and turkey bacon (or "Fakon" if that's still a thing) and you have yourself a fabulous, guilt-free, breakfast! ENJOY!


January 8, 2014

Vegetable Soup

I made this soup right before the chaos holidays started because the weather definitely called for it. The weather has progressively gotten worse and it's made me think this is the perfect time to share my soup recipe. I started making veggie soup as a way to get one of my favorite meals without all of the extra garbage that comes in the canned soups. I have wanted no part of the condensed, salty, unfilling soup that I used to love - especially when I figured out the secret. The veggie soup I make is really easy and, as far as soups go, doesn't take too long. It's adapted this soup from a Zucchini and Potato Tomato Soup recipe from The Little Kitchen food blog. I've made some changes to fit what I like in soup but I'll always be glad I found this recipe.

What You'll Need:
1/2 pound of small noodles (ex. mini conchiglie)
1 1/2 Tablespoons of olive oil
1/2 diced white onion
3-4 medium sized potatoes (peeled and chopped)
2 zucchinis (quartered)
14 oz. can of diced tomatoes (with juice)
2 15 oz. cans of chicken broth
1 teaspoon black pepper
1/2 teaspoon of garlic powder
2 Tablespoons of dried oregano 
1 Tablespoon of dried basil 
1 can of whole kernel corn (drained)
Salt to taste

1. Start your pasta water. It's the worst to forget about this part so it's best to get it out of the way.

2. Add the olive oil to a large pot on medium heat then add the diced onions and stir occasionally. As these are cooking dice your peeled potatoes into small chunks. Remember that they'll cook better if they are the same size.

3. Once you add the potatoes, make sure to stir them constantly. All of the starch will make them stick so keep an eye on them while you cut the zucchini. For the zucchini, start by cutting of the ends, then slice the zucchini long way so you have two halves. Then cut those halves to get quarters. I suppose you could dice them so they would be the same size as the diced potatoes but I they do tend to get pretty soft by the end of the cooking process and you don't want zucchini mush in your soup. Unless you do of course. You're better of making sure everything is cut even. 

4. Add the zucchini to the potatoes and onions and let cook for about three minutes. 

5. Now is the time where this goes from cooking some garden veggies to really making it a delicious soup! Add your can of tomatoes and let them incorporate with the other veggies for a minute or two - just long enough for you to get your herbs and do the "revival" method. This is just the part where I put the dried herbs in the palm of my hand and rub my palms together so that it really wakes of the flavors of the herbs and they don't taste like they've been sitting in a plastic container in your cabinet for far too long. 

6. Stir everything and make sure all of the herbs are good to go. 

7. Add your chicken broth and let it come to a boil. Turn the heat to medium-low and let it simmer for about 15 minutes. Carefully taste the broth and see if it needs any more seasonings.

8. At this point your pasta is probably ready or close to it. Make sure to drain AND rinse it. The potatoes are starchy enough to thicken everything and pasta starch isn't necessary. FYI this is the pasta I used. I use a lot of products from this brand and I love it. I didn't even know they made this size bag until I went looking for something to add to this soup. I think it was 80 cents. Not bad huh?

9. After about 15 minutes the potatoes should be fairly soft. If you taste them be really careful! Those suckers are hot! Add the corn (drained) and the pasta. Add any salt and pepper to taste. That's it. You'll either have enough to feed four or enough for two meals for two. I like to serve this with my no-knead white bread but it doesn't need it. I hope you enjoy!

November 1, 2011

Halloween Treats - Pinwheels and Pizza

One of my favorite holidays is officially over. It makes me sad because I absolutely love Halloween, but I'm also excited because it means the holiday season has officially started. When I was little my parents would let me go all out for Halloween, sometimes having multiple costumes for school and trick or treating. As I got older I looked forward to the month long airing of scary movies. Now I would never say that I'm too old for trick or treating because you can never be too old for a costume and candy, but since my life has been getting increasingly more hectic, the thought of walking in the cold, dressed as a sailor, knocking on strangers doors in an area I'm still new to didn't sound like my kind of thing, besides I had already gone out on Saturday night and had a fabulous time.

 
It didn't help that Halloween was on a Monday this year either, so I was ready to kick back and veg out. I did buy two bags of candy for any trick or treaters that might stop by (but what kid wants to climb stairs just to get candy... ok probably a lot) but our plans consisted of a scary movie marathon, margarita style pizza, and spinach and tomato pinwheels. I don't know if the whole bowl of candy was intended to be on the menu, but Mike and I ate it as an appetizer, main course, and dessert. Ooops...

Right before the good parts of Signs started we made our pizza. In 20 minutes dinner was done. As most of my go-to meals, these are semi-homemade to - you know how I roll.

Pinwheels
I'm not sure what these are really called but this name works for me. I got this idea from a Pillsbury commercial shown during the holidays last year, but I added a little extra oomph - tomatoes!! This is the perfect appetizer. I'm thinking about making these for Christmas Eve when I visit my family because they're so easy.
What You'll Need:
1 can (roll?) of refrigerated biscuits
chopped frozen spinach
1/2 a tomato
1/2 C of mozzarella cheese

Start by taking out all of the biscuits and rolling them into one piece of dough. Make sure the dough is rolled about 1/2 an inch thick. Sprinkle the cheese, spinach and tomatoes and lightly press down into the dough. Then roll the dough as tightly as possible and cut the roll about a 1/4-1/2 inch thick and place them on a greased cookie sheet. Bake them for as long as the container says to - about 10 minutes.

Eat them while they're hot. We ate ours with the pizza and it was the perfect meat-free (guilt-free) meal for a night in. 

Margarita Style Pizza

Once again this is an ode to a semi-homemade meals. I didn't feel like making a homemade crust so I bough one from the store. The crust was a little more spongy than I'm use to but the taste worked because of all the flavors on top. I made my own pizza sauce too.

What You'll Need:
Pizza Sauce
Pizza Crust
Mozzarella cheese slices
Basil
Tomato slices 

How could a pizza this simple be bad? For my sauce I just used one small can of tomato sauce and added some salt, garlic powder, Parmesan cheese, pepper, and oregano. I spread the sauce over my store bought crust, then put a layer of basil, cheese and then tomato.

Bake the pizza for 14 minutes at 450 degrees. This is just long enough to put the dishes in the sink (to wash later) and perhaps make a drink...hmmm...

This pizza is the perfect light pizza to eat while your sitting in sweats watching scary movies on the couch. I put a little fresh basil (which is currently my new obsession) on top and curled up - mainly because I was too scared to keep my feet on the floor... The tomatoes are so juicy and the cheese is so creamy that you should probably make two pizzas because they're so good.

We ended up having the best Halloween. It was perfectly relaxing and I couldn't have asked for anything better. I hope you all had a good Halloween too. I look forward to starting the fall off with you guys. Cheers!

October 4, 2011

Spinach Quiche

Quiche is one of the things I have always loved but left for other people to make. My favorite version is mini quiches - like the adorable ones that are always served at fabulous parties. There's something crazy good about a flaky crust filled with an almost creamy, fluffy, center. Not to mention I love any dish that can be made with pretty much anything I have. As a working college student I love me a no-fuss recipe. I adapted my recipe from Just Eat, it's such a great blog, check it out. This is super easy to make and really really delicious.

What You'll Need:
4 eggs
1/3 C milk
1 1/4 C cheese
2 tsp salt
1 1/2 tsp pepper
1/2 chopped onion
1 tomato
6 sliced mushrooms
1 1/2 packages of frozen spinach
1 cold pie crust (below)


Pie Crust
I started by making my own pie crust for this. If you usually rock a pre-made pie crust those work just as well but pie crusts are soo easy and they get really flaky. Here's how I made mine:

What You'll Need:
1 1/4 C all purpose flour
1/2 C cold butter (cubed)
1 tsp salt
1 tsp sugar
3-5 tblsp of water

Mix your flour, salt, and sugar in a mixing bowl. I still don't have a standing mixer but my grandma doesn't need one for her pie crusts so I'm going to say I don't either, I just use my hand-held dough cutter to, well I'm assuming, "cut" in the butter. Once it looks like course sand, add your water one tablespoon at a time. This time I ended up needing four tablespoons to get the consistency I wanted, kneading it continuously. Knead it into a ball and keep in the refrigerator until your quiche (or any other type) of filling is ready. 


First, preheat the oven to 350 so you don't have to wait later on, it's lame.

My quiche was filled with two kinds of cheeses, 1 cup of mozzarella and 1/4 cup of a Mexican blend (which included pepper jack and cheddar cheese). The pepper jack ended up adding a really nice, deep flavor to the quiche.

In a bowl I mixed the eggs, milk, and cheeses. Then I added the salt and pepper and set it aside.

In a large pan, saute the onion until they're translucent then add the mushrooms. I decided to add a little chopped garlic because I'd pretty much eat garlic on anything and this was no exception.

I wanted to add some tomato because I was sure they would add some awesome color to my quiche. Red pepper would have worked too but I always have tomatoes on hand and they seem to always add a great color, texture, and taste to my meals. I love the little things.

The last thing you want to add is your defrosted, drained spinach. The colors are about to get insane right now! Make sure everything is mixed and fully incorporated.

Add your spinach mixture to your egg mixture and fold in. 

Take out your crust roll it out on a clean, well-floured, surface. It's good to have the chunks of butter in the dough because that's what makes it flaky. Pour the spinach mix over the pie crust.

Place this in the oven for 25 - 30 minutes, until the top is a light golden brown.

When the quiche comes out you're going to see that this recipe is a keeper. Now, I'm a "sides" kind of girl, I love serving main dishes with some sort of side. I guess I feel that a meal isn't complete without them. This was an exception. This was the only thing on our plates and it's all we needed. The spinach was crazy, crazy, crazy it was so good and everything else was fluffy. You can taste every single thing that goes into this. And the perfect thing about this is, if you're like me and you get home late most nights, you can eat this and you don't feel like you over-ate even though you're full. I now have a great recipe that I can make into fabulous mini quiches or smaller personal sized portions.

September 21, 2011

Spreads & Other Snacks for "Grown Ups"

I dedicate this post to World Market and my fellow foodies who go shopping when they're hungry. There's no denying it, and I applaud you for it because this is when I find some of my favorite snacks. Mike and I went to World Market today to look around and came out with some great stuff - including a much needed lamp shade. But food-wise we scored some new snacks too. We ended up with some Scottish strawberry champagne preserve, Cafe Du Monde beignet mix, two plates, and a little dipping dish - all for just over $26! We decided to wait on the beignets (as hard as it was) and picked up a baguette to try the preserves instead.

I was really excited to try this because the cashier lady said it was one of her favorites. Really, at that point I was so hungry I would have tried it regardless. 
My new little dish :)
I washed some grapes I had in the fridge and decided to see what else we could snack on. I had some dried cranberries leftover from my Cranberry Orange Scones so I took them out too. All we had to buy was a "rustic sweet baguette" loaf. It must have been destiny (or at least luck) because we got the last fresh loaf.

We sat down on the couch (turned on the television) and got ready to try our little snack feast. The preserves were so delicious but they were definitely on the sweet side. We needed something to cut down on the sweetness so I brought out some brie (the Laughing Cow brand) that I had in my fridge. I put some cheese on a piece of bread then some preserves - foodie heaven, let me tell you!! The brie made it really creamy. I absolutely love strawberry jam and this one is definitely a keeper. It had a slightly stronger taste and a more intense flavor. I loved it!


Oh, here's a little extra info about the difference between jelly, jam, and preserves - for anyone, like me, who didn't know until today. According to TLC Cooking,
  • In jelly the fruit comes in the form of fruit juice
  • In jam the fruit comes in the form of fruit pulp or crushed fruit
  • In preserves the fruit comes in the form of chunks
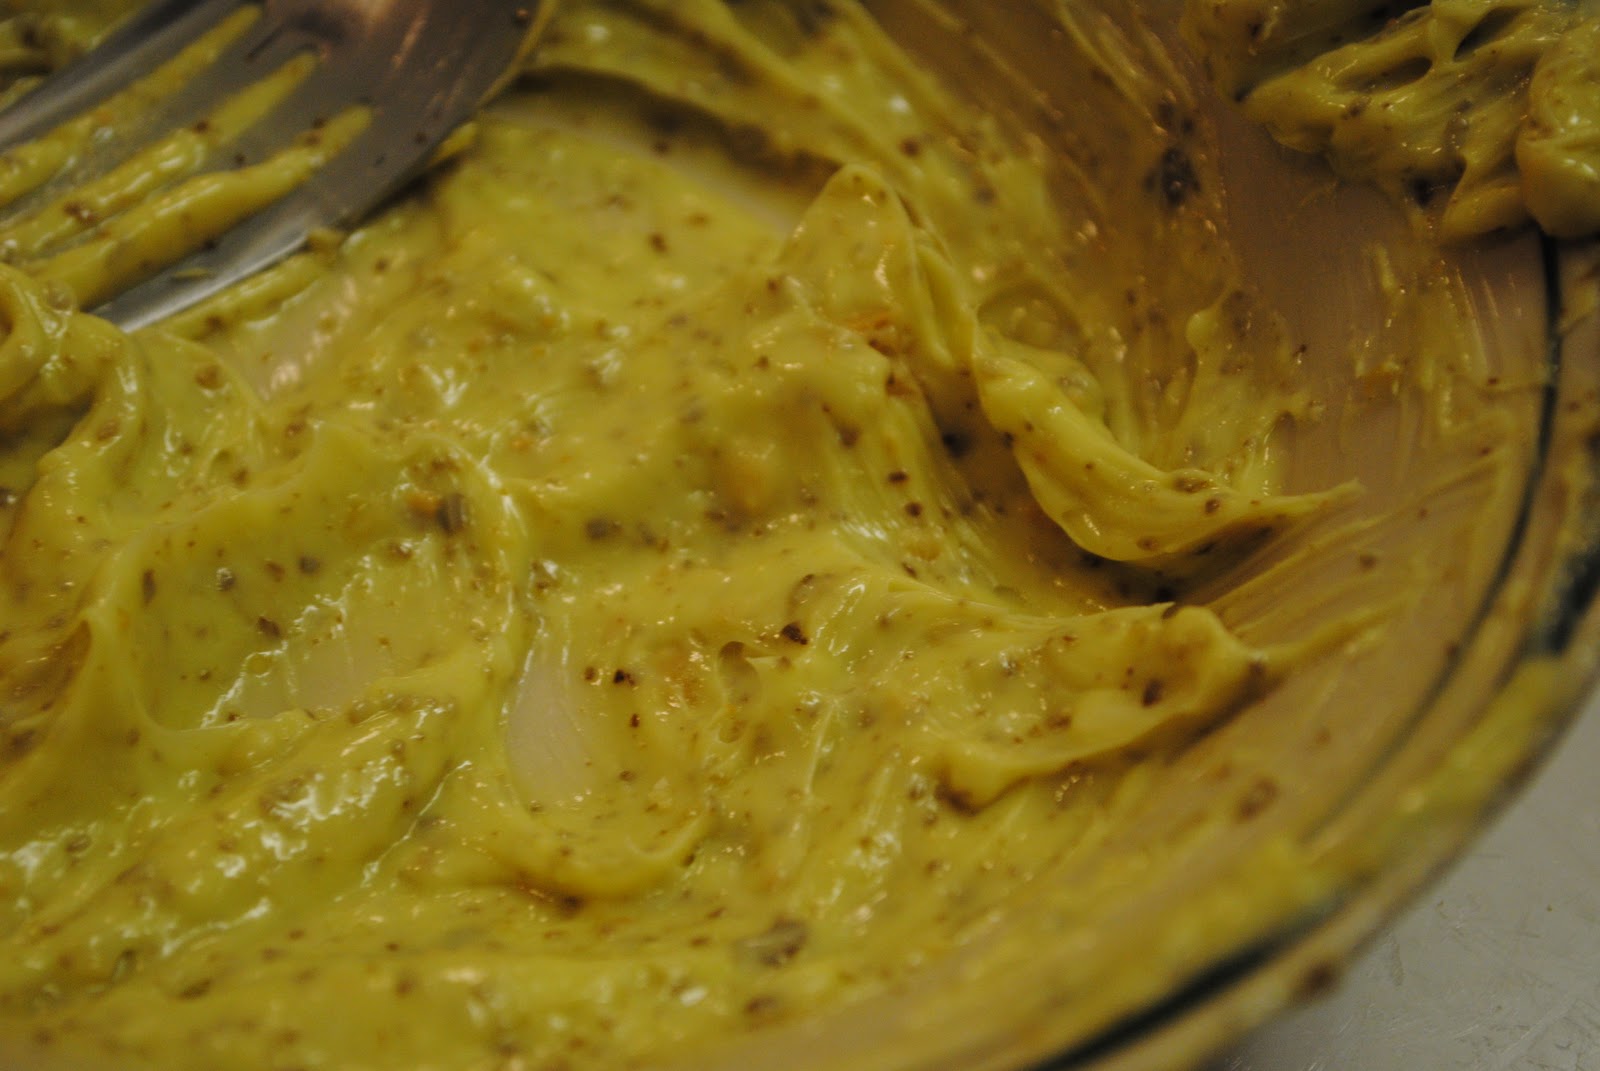
After snacking on this for a while we decided we wanted a more savory spread - but that's one thing I didn't have laying around in my fridge.... so we made a pesto butter. It was so simple to make. 

What You'll Need:
1/2 a stick of butter
3 tsp of pesto
salt and garlic powder to taste

Make sure the butter is room temp and mix your pesto in. Add your seasonings to taste. When it's how you want it, put in in the fridge for 10 minutes. We use this pesto for everything. I've mixed it into pastas and put it on chicken. I always have a jar of this in my fridge.

When the butter was chilled, we cut some more bread and sat back down. I have to say the mix between the savory pesto and the sweet preserves was unbelievable! All together it was an awesome snack that's so much better than your average bowl of chips. You could definitely serve these as snacks for guests or as a date night snack for a night in. Either way I love you enough to share this simple snack with you! Enjoy!

September 18, 2011

Cranberry Orange Scones

For the past couple of weeks it's been quite obvious that I'm on the lookout for fall. I've been sort of rushing it by making warm dishes and baking... which must mean that I'm desperate because I'm not much of a baker. One thing that I was dying to try to make for the first time was scones - but a very specific type. I wanted to make the kind that they have at my school, the ones that I'm borderline addicted to and go amazing with 50 cent coffee, not nasty 50 cent coffee, but the kind of 50 cent coffee I look forward to and will go across campus to get whether I'm running late or not. That last statement is very, very true. Anyway my school has cranberry scones for a dollar that are responsible for turning me into a scone lover. Not to throw any "major coffee companies" (cough cough) under the bus but all I've ever had are dry scones which never made me a fan. I finally worked up the energy, I mean courage, to try to make them myself.

What You'll Need:
4 C + 1/4 C flour
1/4 C sugar
2 Tbl baking powder
2 tsp salt
1 Tbl orange zest
3/4 C cold diced butter
4 eggs, lightly beaten
1 C cream
1 C dried cranberries
1 egg beaten w/ 2 Tbl water
1/2 C confectioners sugar + 2 T
4 tsp orange juice

Start by preheating your oven to 400. In a large bowl mix the the 4 cups of flour, the sugar, baking powder, salt and orange zest. Add your diced butter. According to Ina Garten, this should be done in a mixer but I don't have one because they're freaking expensive. I know, I know I'm probably breaking some sort of baking rule again. I just used a dough cutter to roughly mix (more like incorporate) the butter throughout. You'll want the butter to be crumbly. The dough cutter did a fabulous job.

In a separate bowl, mix your cranberries with the 1/4 cup of flour and toss together. Add these to the big bowl.

Lightly beat 4 eggs together with the cream. Add this to the big bowl. The reason that I added this after the cranberries is because I figured the cranberries would mix easier in flour than the dough so I did that first. I ended up being right.

When everything is carefully mixed, it's time to get messy! Roll the dough into a ball. Flour a large surface and a rolling pin so you can roll out the dough. Roll it out until it's 3/4 of an inch thick.

Line two cookie sheets with parchment foil. I thought I would only need one tray but I wasn't sure how they would bake so I spaced them out and ended up using to cookie sheets.

Use a biscuit cutter or anything that's around 3" in diameter to cut out your scones. I don't own a biscuit cutter so I used a normal plastic cup. It worked just fine. 

Keep rolling out the scones until all of the dough is done. This batch should make about 14-16 scones. Of course I got 17.

Make a quick egg wash (one egg with water) and lightly brush the tops of the scones. After this step sprinkle sugar on the top of your scones and bake in the oven for 20 minutes, until they're golden brown. I literally used the last granule of sugar for the dough so I didn't have any extra but I wouldn't recommend skipping this step.

When the scones are done put them on a cooling rack. While you wait, make can make your glaze - yum!! This is the easiest thing to make too. Start by mixing your confectioners sugar and orange juice. If it's not the consistency you like add more of whatever you need. I eventually gave up when it wasn't as thick as I wanted. Confectioners sugar isn't my favorite taste so adding more to make it thicker wasn't my idea of good eats. What I didn't realized was that it wouldn't really make a difference because the scones were phenomenal already! When it's how you want it drizzle it over your cooled scones.

Foodie heaven!
 I would have eaten more as soon as they were done but considering I started making these around 9 pm, and the true test was how they would taste with coffee, I only had one.

The next morning I couldn't wait to try my little meal (when you're in college this is considered a meal) and in true everyday fashion, I was running really late. I'm talking about and hour and a half late to get on the road to my parents' house. But it was so worth it! They were exactly what I wanted! I have to admit that I might prefer them with my Dunkin Donuts brand coffee a little more than the 50 cent coffee but could you blame me? The centers were perfectly cooked (baked?) and they actually had a hint of orange. I wasn't sure if they would be too orangy. I was nervous because I didn't use a lot of sugar either when making these so I was afraid they wouldn't be sweet enough but the cranberries add the perfect amount of sweetness. It was definitely the best breakfast I've had in a while. Even as a snack, I can't resist them. I don't think you'll be able to either!