Pages

December 4, 2013

Homemade Caramel Corn

It has been unnecessarily cold outside these days. I wished for colder weather and I guess I got it. Now, it's not my fault that this weather makes me want to eat everything in sight but it does. So when I had a day off recently I really wanted something comforting and sweet. I set off to Pinterest to find something that would hit the spot, and boy did I find it. I can't seem to find the original source but if anyone knows who it is feel free to let me know so I can credit that wonderful, wonderful person. Anyway the recipe is Caramel Marshmallow Popcorn and is super simple to make. If you frequent Pinterest as much as I do, then chances are you've come across this recipe. And if you haven't made it yet you definitely should. Some pieces are soft and gooey and some are just sweet like kettle corn. Anyway, it's simply amazing and only requires a few ingredients. In other words, it's my dream recipe.
 What You'll Need


1/2 C of Brown sugar
1/2 C of Butter (it's worth it!)
Around 1/2 cup of mini marshmallows
1 bag of microwave popcorn

*I admit the ingredients may seem somewhat indulgent but it's the holidays. That means indulgent foods are a requirement. Trust me. I adapted this recipe because I'm not a fan of microwaving things if I can just use a sauce pan - textures, flavors, and things tend to get weird in microwaves. I did, however, use it to cook the microwave popcorn. I totally prefer stove-popped popcorn I just didn't have any so I went with the processed stuff this time and thought it came out great. Use what you'd like though. 

1. In a small sauce pan melt the butter. Add the sugar and wait for it to dissolve. Meanwhile, pop your corn and set aside in a serving bowl. You'll be adding the marshmallow mixture to the popcorn soon so make sure the bowl will be big enough. 

2. When it's approaching smoothness you can add the marshmallows. Confession, I used all of the marshmallows that I had. Like, all those in the picture went into the butter. Minus the one's I ate of course. it was a lot of marshmallows. Now that this is off my chest we can move on. You should have this on low-medium heat just to make sure it doesn't burn. Now stir! Mix it until the marshmallows become creamy, kind of like you're making Rice Crispy Treats. 

3. When it's all mixed and smooth pour it on the popcorn. Gently stir that to incorporate all of the ingredients. Then voila, you have caramel marshmallow popcorn! I suggest eating this with a partner because it does get pretty sweet. And if you conquer this yourself then hell yeah to you! I hope everyone enjoys this. Cheers, until next time!

July 31, 2012

Lemon Chicken


Everyone loves takeout. I don't care if you're willing to admit it but I know it's true. Come on, you're a foodie I would never hold that against you. I do, however, recognize the drawbacks of the usual takeout foods like that they're greasy, full of MSG, fat, and everything else that makes them good. So how can you resist a recipe that is homemade and BETTER than what you get for $8.00 a portion at a restaurant? I don't think you could.

I'm posting a few more pictures here because the steps are pretty specific. Hope they help.

What You'll Need:
2 1/2 lbs of chicken breast
2 Tbsp soy sauce
1/2 tsp salt
3 eggs
1 cup cornstartch 
1 1/2 tsp baking powder
pepper
Oil for frying
(recipe for sauce is below)

1. Start by cutting your chicken into cubes. We're going for bite-size here.

2. Add the soy sauce and salt to the chicken. Cover and place it in the fridge for at least 30 minutes. Don't be afraid of the soy sauce here because you're not going to be adding any salt later. Now's the time to get salty.

3. When the chicken is almost ready get your oil hot. You'll need about 2 inches of oil. You can also get your batter ready.

4. In a bowl mix your cornstarch and baking powder. When it's mixed add your eggs and pepper. It's going to be hard to mix because of the cornstarch so you'll have to mix pretty fast in order to get everything incorporated. It's kind of like a science project.

5. Put your chicken in and get it all coated.

6. Put small batches of chicken in the oil in order to control cooking temperature. We were able to get everything done in two batches. Cook until the chicken is "the right color" (Mike's words, not mine) then use a meat thermometer to make sure chicken is fully cooked. Put it on a paper towel covered plate to drain any excess oil.


Lemon Sauce

What You'll Need: 
1 cup chicken broth
2 Tblsp of cornstarch
1/3 cup sugar
2 Tbsp lemon juice
3/4 tsp salt
2 Tbsp oil
1. In a small sauce pan (which is appropriate) combine your chicken broth, sugar, lemon juice and salt and warm over low heat.

2. Remove this sauce and place in a bowl so you can add the cornstarch. Whisk it together. 

3. When it's all mixed heat the 2 tablespoons of oil in the sauce pan so it get's really hot. When it's ready add the sauce back into the pan and mix frequently until it thickens. If you want make the sauce pop a little more add two drops of yellow food coloring
The sauce pre-food coloring and thickened.

With the food coloring added. A little really goes a long way.

4. Pour the sauce over the chicken and coat it evenly. Mmmmm.....

5. Serve with your favorite sides and ENJOY!

We usually serve this dish with rice and broccoli. Honestly the chicken is great base for any sauce or just as-is. The soy sauce marinade gives the chicken a really great seasoned flavor that makes it hard to resist eating the chicken on the spot (hard until the sauce is ready, anyway). The sauce is really sweet and has a great tang. It really is the best homemade takeout dish and better than what you find at a restaurant.


July 16, 2012

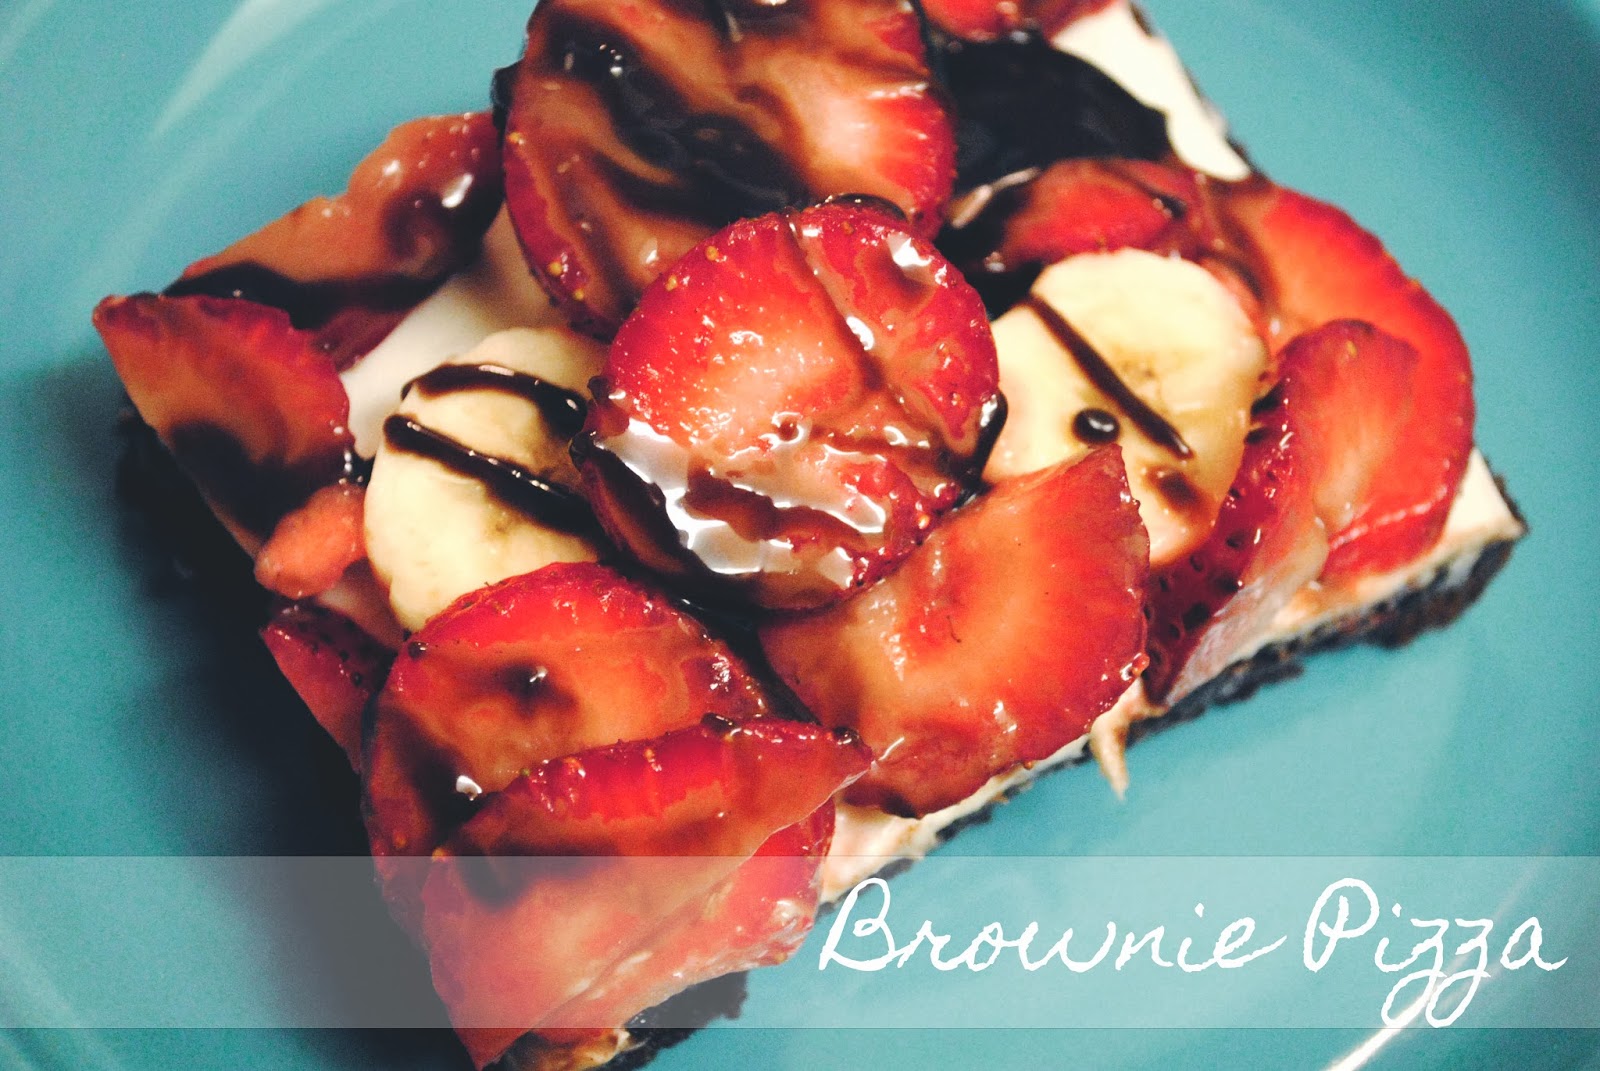
Brownie Pizza

 It's been a long time since I've posted a dessert but the time has come and I think you're going to like it! It all started the other day when I had a basket full of fresh strawberries and nothing to do with them. I planned on eating them like so but decided to make a dessert instead, the problem was that I didn't know what to make. Out of nowhere I remembered this dessert my mom had brought home from work once and knew that was exactly what I was going to make. We call this incredibly decadent dessert Brownie Pizza but Mike calls it a tart and I'm not sure why. And even though there is fruit on this, I recommend putting the calories away for this one.

What to Do:
1. Start by making a brownie mix according to the directions on the box. You can use a homemade brownie mix or the box stuff. I obviously don't bake much (if you follow my blog you know I like my baking shortcuts) so I gladly used my usual boxed brownie mix. Oh simplicity.

2. Instead of putting the mix in the usual 13x9 baking dish, put it on a cookie sheet that is really well greased. I believe the one I used was 13"x10". Cook for 15 minutes at 350 degrees. 

3. 15 minutes later you'll have exactly what you need. Make sure you let it cool completely. This is a cold dessert so I recommend letting it sit out or in the fridge for a couple of hours.

4. Next it's time to make the frosting. Use one package of cream cheese and 1/4 cup of sugar and beat together until the sugar is totally incorporated. If you taste it, you have to try not to eat the whole thing right then and there. Trust me, I know how tempting it will be.

5. When the brownie is fully cooled you can either move it to a fancy platter or leave it be on the cookie sheet. Because I'm not a baker I tend to have to little luck with my baked goods being transferred cleanly and in one piece so I opted to leave it on the cookie sheet. No biggie. When you have the brownie correctly placed slather (yes I meant to type that) the cream cheese frosting on top, making sure that you get the ends and corners with extra. I usually hate the edges of baked goods which I why I tend to over-compensate with them.

6. Now for the healthy stuff. I've never used any other fruits than bananas and strawberries but if you ever try this and use something else, please let me know! The important thing to remember for the fruit is to make sure all of the slices are even AND that they are patted dry to get rid of any extra moisture. You can just use a paper towel for this.

*I used two medium sized bananas and laid those down first because I know they go brown and I wanted this to look pretty.

7. Then add the strawberries.

**This is where it gets interesting.

8. Heat the fudge according to the directions then drizzle it over the brownie. You can also use chocolate syrup but I already had the fudge so I used it. 

Voilà! Foodie heaven! When you eat this you get a chewy, moist brownie with a sweet cream cheese taste. And just when it becomes too much you get the freshness from the strawberries and bananas that cut down the decadence and add their own refreshing sweetness. It's pure magic! I owe this dessert to my mother who brought it home and now has the recipe forever on my blog! Thanks mama! So I hope this has tempted you to get up and eat something sweet! Go ahead, go - I won't judge you. Until next time, cheers!


July 14, 2012

No Fuss Spinach Dip

Do you know my favorite part of pizza night? Well besides getting to eat pizza, it's also being able to eat all those junk food extras like buffalo wings, cheesy garlic bread, mozzarella sticks or, in our case, spinach dip. I love having sides with pizza because if you're going to indulge in pizza, possibly the best food ever, then you might as well go all out, right? And I have a great fondness spinach dip so when all we had in our freezer was a frozen pizza (reserved for nights when we both get off work late and don't have time to cook - please don't judge me, we're in college and they're delicious) then I knew that was my chance to add something fun on the side. To me a frozen pizza is like a blank canvas in that you can add your own snacks and sides or toppings in a quarter of the time to get something really cool and totally custom made.

Like I said our pizza was for after work so before work I decided to get some kind of side ready so we could come home and eat. I started craving spinach dip, unfortunately I didn't have the things I usually use like water chestnuts or leek soup mix so I had to improvise. And because I came up with this idea last minute I was determined to not have to go out and buy anything for this dip. The end result is a great throw-together dip with things you already have in your kitchen, and the best part is that it tastes so good no one will ever know!

What You'll Need: 
1 package of froze spinach
1/2 of a small onion
1 small red pepper
1/2 cup of mayo
1/2 cup of sour cream
2 Tblsp of garlic powder
3 Tblsp of Parmesan cheese
sourdough bread for dipping

What To Do:

1. Thaw out a 9 oz. package of frozen spinach. If you have the microwave kind, great. If not I usually put the frozen block in about a half-inch of simmering water and let it thaw out.

*If you're using this method, then use a fork to break up the chunks being careful not to scrape your pot. It breaks my heart just thinking about it :(
2. Once the spinach is drained give it a rough chop to make sure that it's not stringy or that the leaves aren't too big (no one wants a giant string of spinach). Also, mince up half of a small onion and the pepper.

3. Mix the spinach, onion, and pepper in a medium bowl.

4. Add the mayo, sour cream, Parmesan cheese, and garlic powder to the spinach mix.

5. Once everything is thoroughly mixed, cover with plastic wrap (making sure the plastic is touching the dip) and place in the fridge for at least an hour - but more is preferred.

6.  Cut sourdough bread into bite-size chunks and enjoy!